Talk2U
Summary: Talk2U lets you place your product into an AI model's hands and have the model deliver a spoken script — producing a complete short-form ad video in minutes.
What is Talk2U?
Talk2U is AI Studio's core ad creation feature. Select an AI model, composite your product into one of its photos, write a script, and the system generates a video of the model holding your product and speaking the lines. The result is a polished short-form ad ready for social media or marketing campaigns.
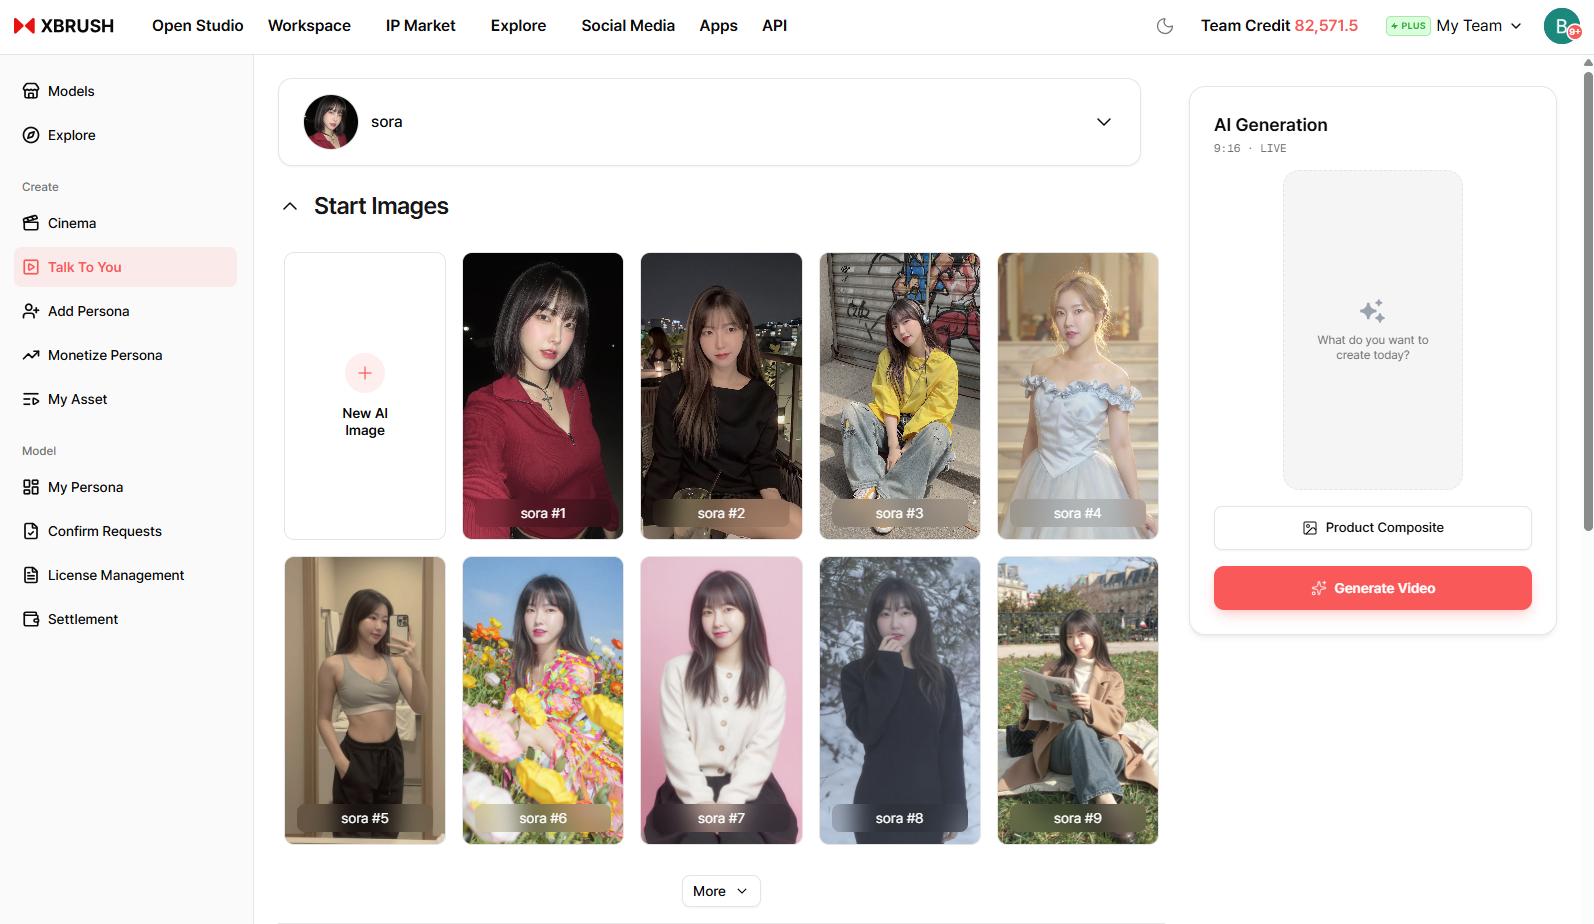
Talk2U workspace — the persona dropdown and Start Images on the left, the AI Generation panel on the right.
Step 1 — Select a Model and Start Image
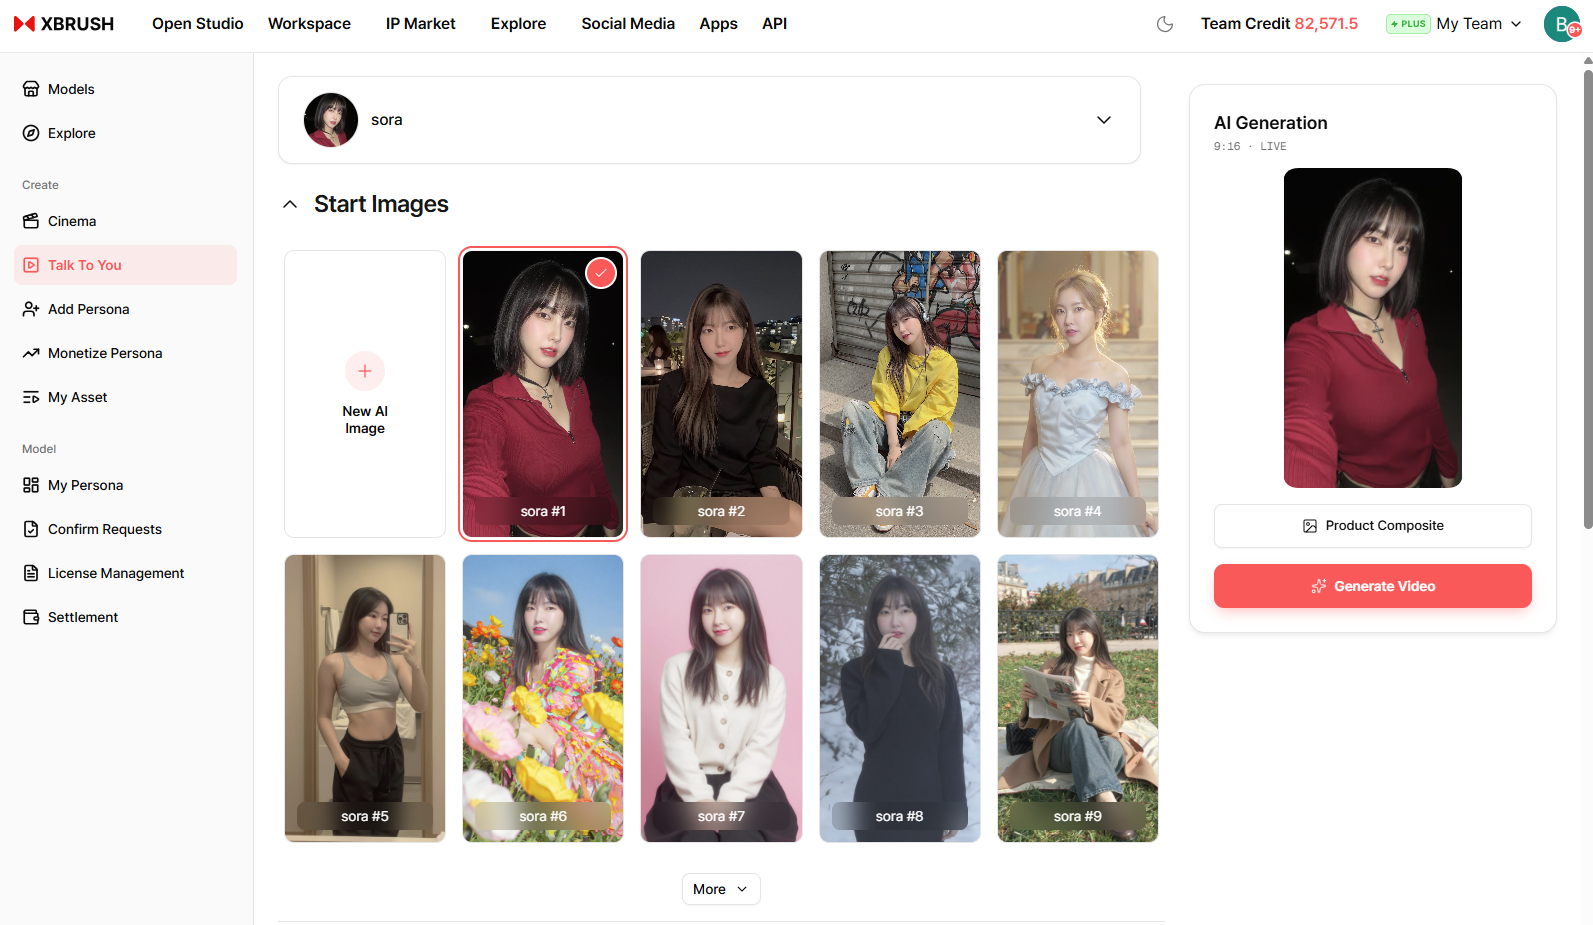
A start image is selected and mirrored in the AI Generation panel on the right.
- Click Talk To You in the left sidebar.
- Open the dropdown at the top to switch to a different persona.
- Under Start Images, click one of the persona's photos to select it. The selection is outlined in red and appears in the AI Generation panel on the right.
- To make a new photo instead, click the New AI Image tile at the front of the grid. Click More at the bottom to load additional images.
The AI Generation panel is where the whole flow runs — Product Composite to place your product, then Generate Video to produce the ad.
Step 2 — Product Composite
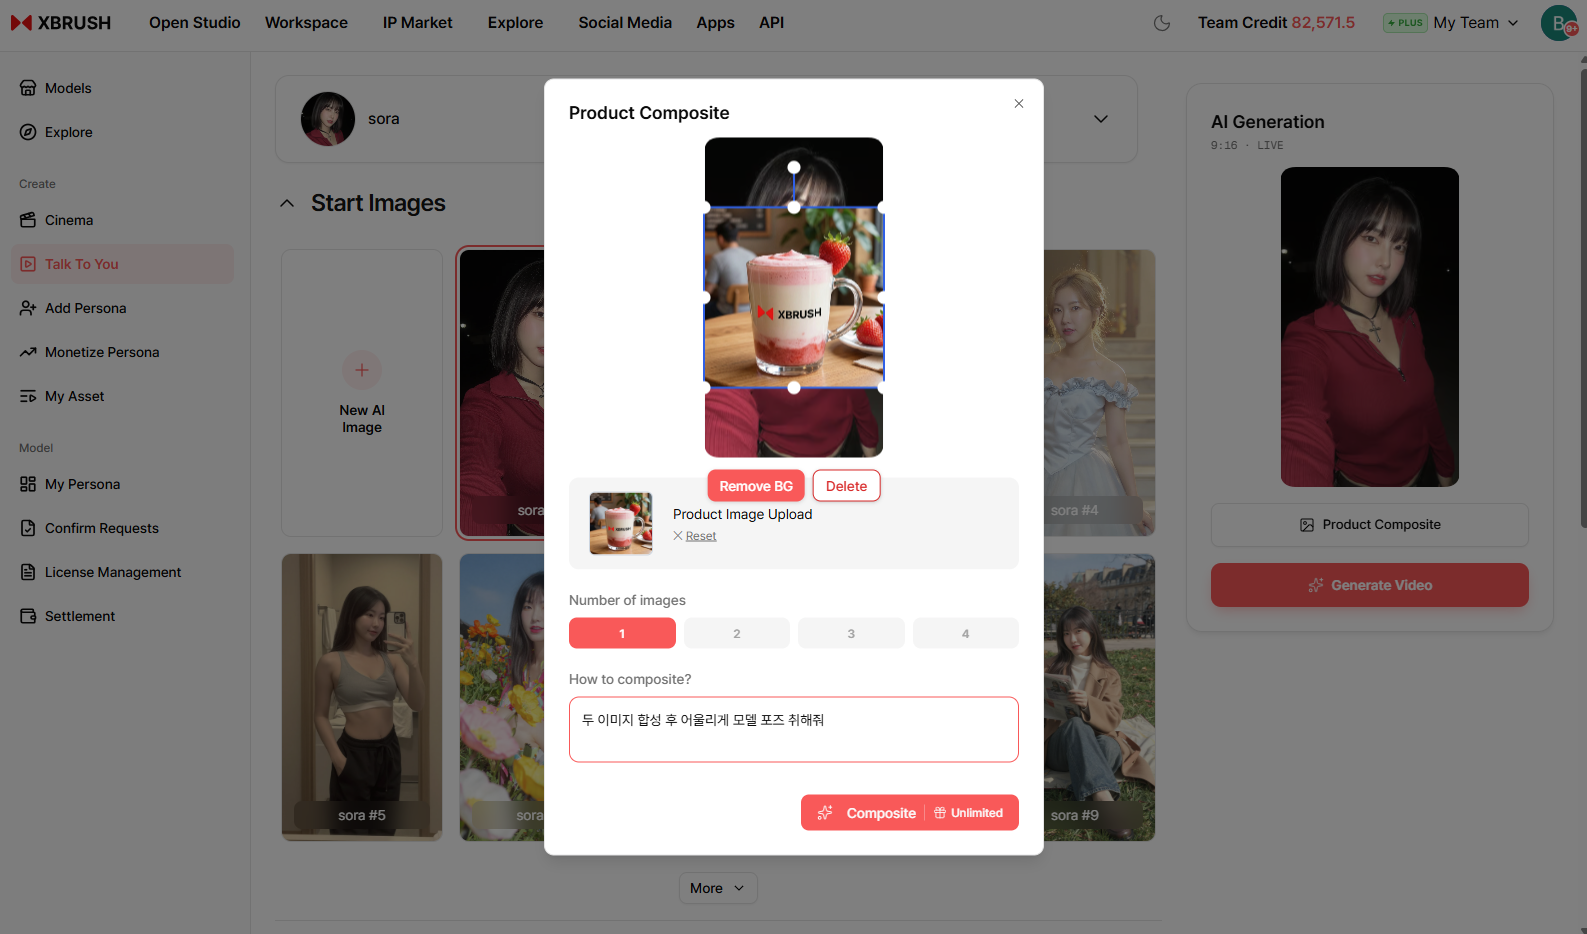
Position the product over the start image and describe how it should be composited.
- In the right panel, click Product Composite.
- In the Product Composite modal:
- Product Image Upload — upload your product photo, then drag the handles to position and resize it over the start image.
- Remove BG — strip the product's background automatically. Delete removes the uploaded image, and Reset returns it to its original position.
- Number of images — choose how many composite variations to generate (1 – 4).
- How to composite? — describe in text how the product should be placed (e.g., "Composite the two images and have the model pose naturally with the product").
- Click Composite to generate. The label next to the button shows the cost or your remaining free quota.
The composite result is added to Start Images and becomes the base frame for video generation.
Step 3 — Agree to the Real-Person Persona Notice
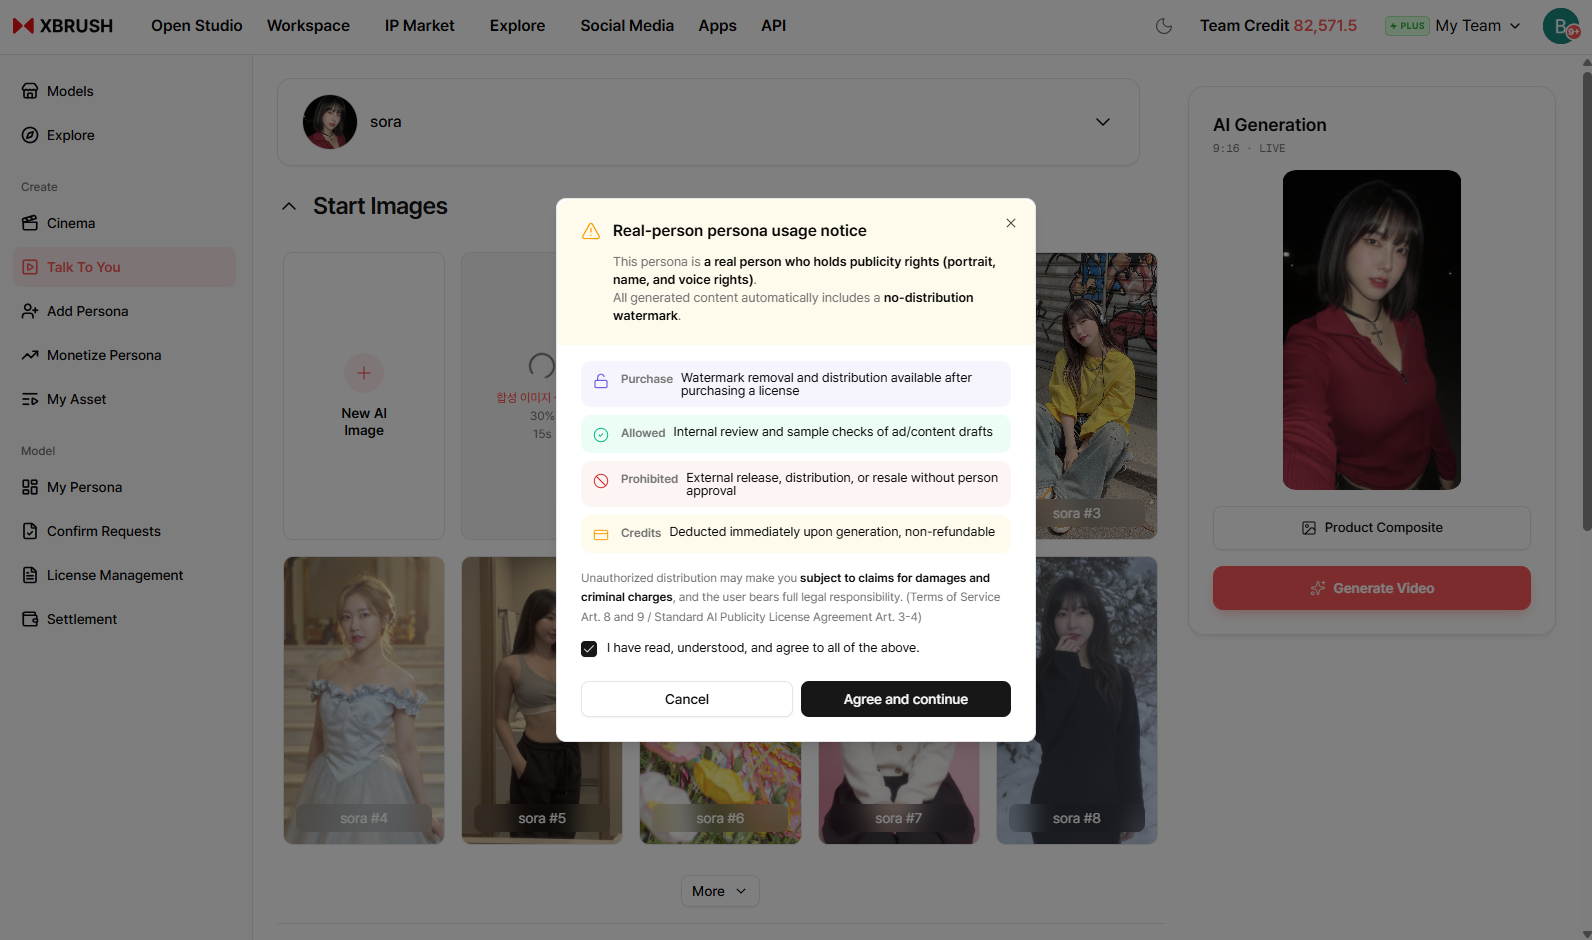
The notice appears right after you start a generation — here, while a composite runs at 30%.
If the persona you selected is a real person holding publicity rights (portrait, name, and voice rights), a Real-person persona usage notice appears before the job proceeds:
| Item | What it means |
|---|---|
| Purchase | Watermark removal and distribution become available after you purchase a license |
| Allowed | Internal review and sample checks of ad/content drafts |
| Prohibited | External release, distribution, or resale without the person's approval |
| Credits | Deducted immediately upon generation, and non-refundable |
Tick I have read, understood, and agree to all of the above, then click Agree and continue. Cancel aborts the job without spending credits.
⚠️ This notice appears at each of the three generation stages. Talk2U asks for consent separately for product composite, voice generation, and video generation — the screenshot above shows the product-composite case, but the same dialog, wording, and checkbox appear again when you click Make voice in Step 4 and Generate video in Step 5. Consent is per generation, so agreeing once does not carry over to the next stage; you will confirm three times over a full run.
All generated content automatically includes a no-distribution watermark. Unauthorized distribution may make you subject to claims for damages and criminal charges, and the user bears full legal responsibility (Terms of Service Art. 8 and 9 / Standard AI Publicity License Agreement Art. 3-4).
Step 4 — Make Voice
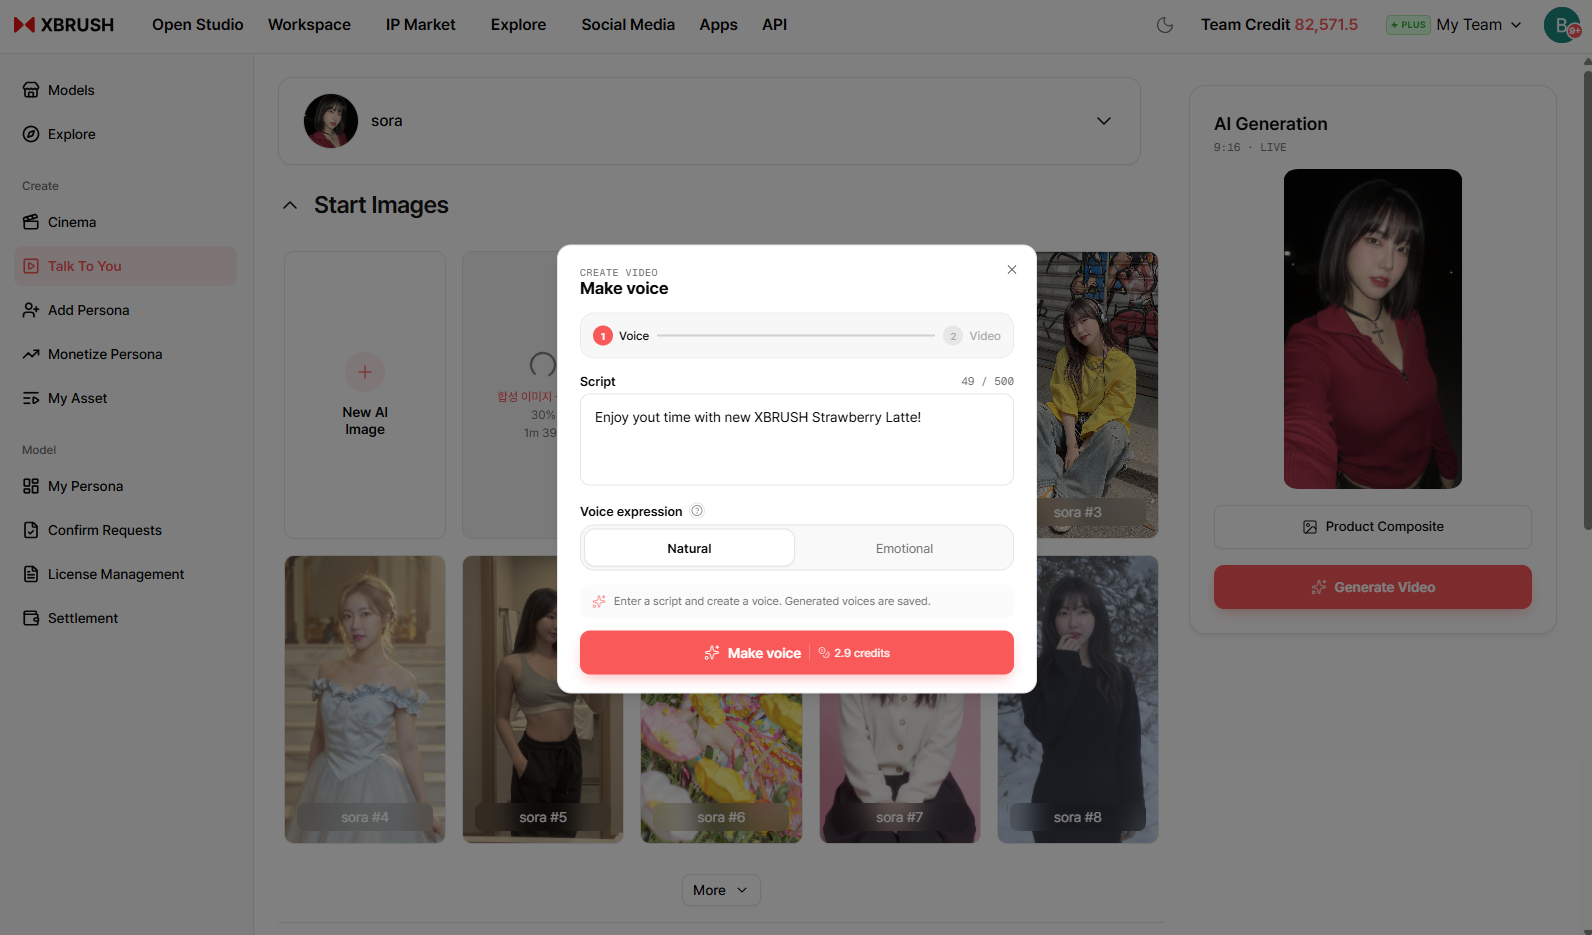
Video creation runs in two stages — 1 Voice, then 2 Video. This is stage 1.
- In the right panel, click Generate Video. The Make voice modal opens on stage 1 Voice.
- Script — type what the model will say, up to 500 characters.
- Voice expression — choose Natural for a flat, even read or Emotional for a more expressive delivery.
- Click Make voice. The credit cost is shown next to the button, and the persona consent dialog from Step 3 appears again.
Generated voices are saved. Any voice you have already made for this persona is listed under Previous voice, and clicking one jumps straight to the video stage without re-generating audio.
Step 5 — Generate Video
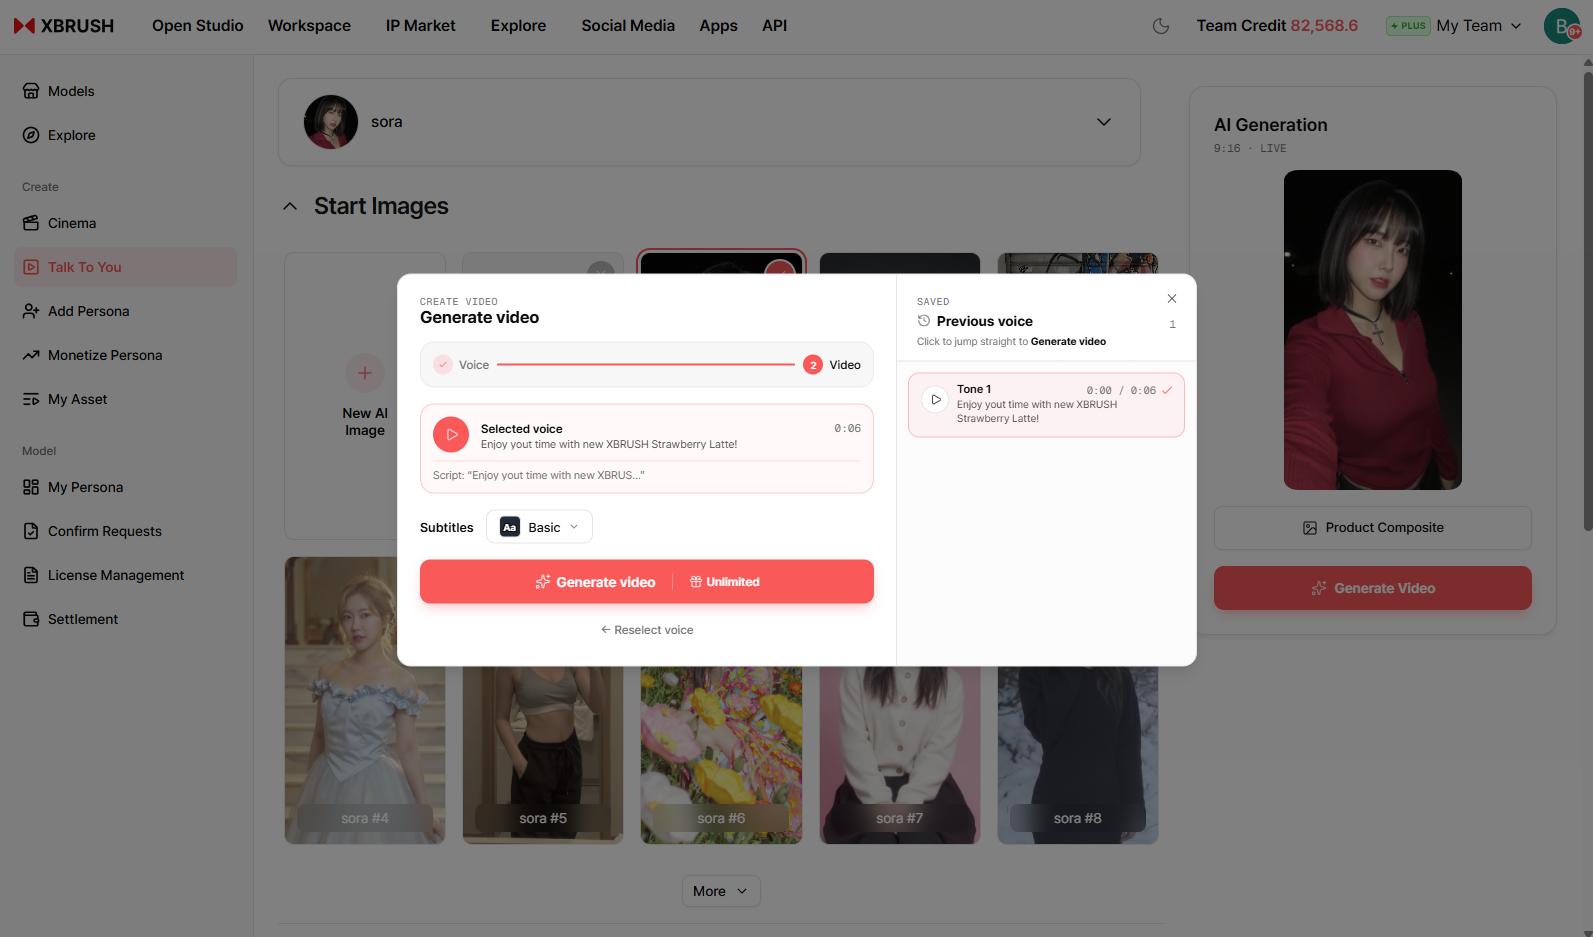
Stage 2 — confirm the voice take, set subtitles, and render.
- Once the voice is ready, the modal advances to stage 2 Video.
- Selected voice — play back the take to check the audio and its length before rendering. Click Reselect voice to go back to stage 1.
- Subtitles — pick a subtitle style, or turn subtitles off.
- Click Generate video. The persona consent dialog appears once more, and rendering starts after you agree.
While the video renders, a progress indicator appears on the card in the workspace showing the current stage and percentage, and a toast confirms that generation has started. You can keep using AI Studio while it runs in the background.
Viewing the Result
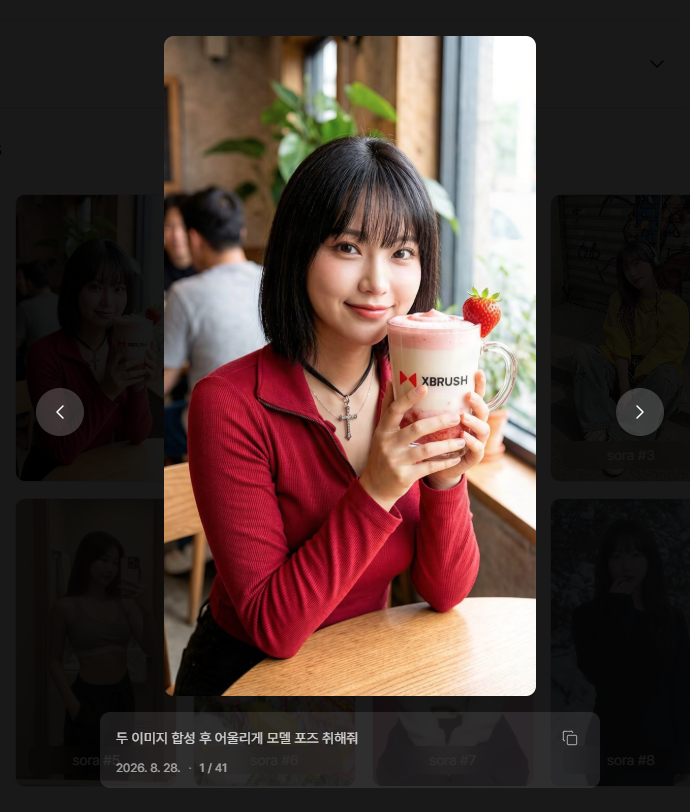
The lightbox — the finished result with its prompt, creation date, and pagination.
- The finished video appears in My Videos and in the Talk2U workspace.
- Click a card to open the lightbox, and use the arrows on either side to move between results.
- Below the player you will see the prompt or script used, the creation date, and the position in the set (e.g., 1 / 12).
- The script you entered is burned in as a subtitle when you chose a subtitle style in Step 5.
- Use the download button to save the video file.
Tips
- Shorter scripts (one or two sentences) produce the clearest audio sync.
- Use Remove BG for product images with complex backgrounds to get cleaner composites.
- Generate multiple image variations (up to 4) to find the best product placement before moving on to the video.
- Reuse a take from Previous voice when you only want to change the subtitle style — it skips the voice generation cost and its consent step.