Cinema
Summary: Cinema offers two ways to create premium ad videos — start from a curated template, or build from scratch with New Creation. Every generated video can be further refined in the built-in timeline video editor.
What is Cinema?
Cinema is AI Studio's premium ad video production feature. Choose from two creation modes:
- Template — Select a pre-built cinematic template with a built-in narrative, persona, and script. Ideal for quickly producing polished brand ads.
- New Creation — Start from a blank canvas and configure every detail yourself, from persona to script to visual style.
All generated videos can be refined in the Timeline Video Editor, accessible via the edit action button on any video.
Method 1 — From Template
Step 1 — Browse and Select a Template
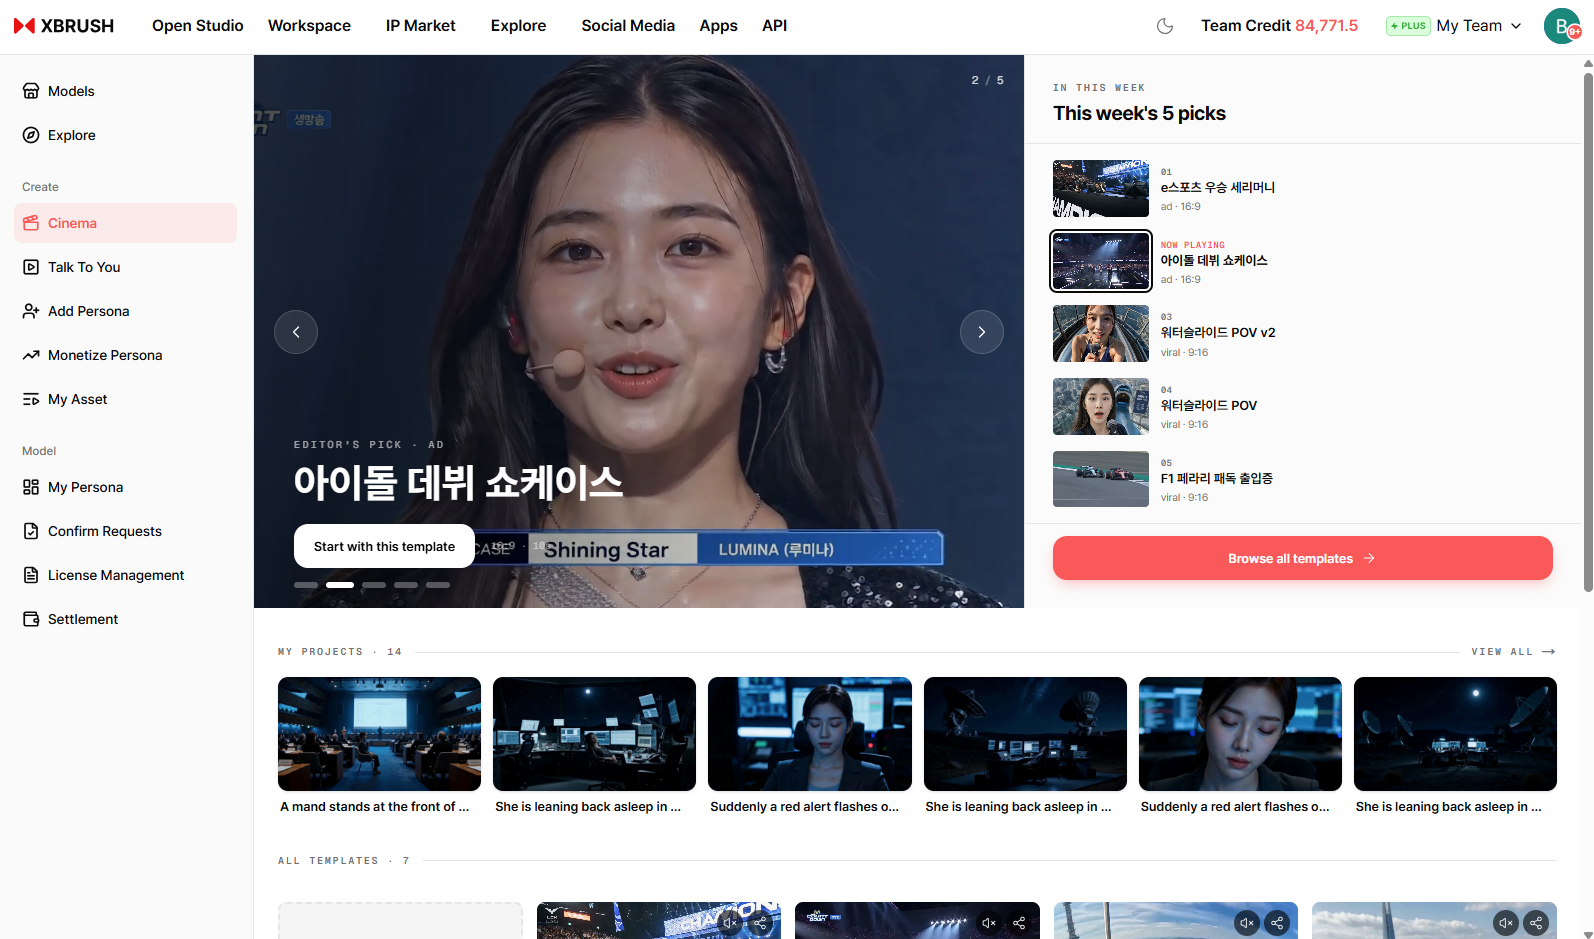
Cinema home — the hero carousel, This week's 5 picks, My Projects, and the full template grid.
- Click Cinema in the left sidebar.
- The hero carousel at the top shows the Editor's Pick template. Click Start with this template to use it right away.
- To see everything on offer, click Browse all templates on the right, or scroll down to the All Templates grid.
- Click the template that fits your campaign to open the creation dialog.
Step 2 — Customize and Create
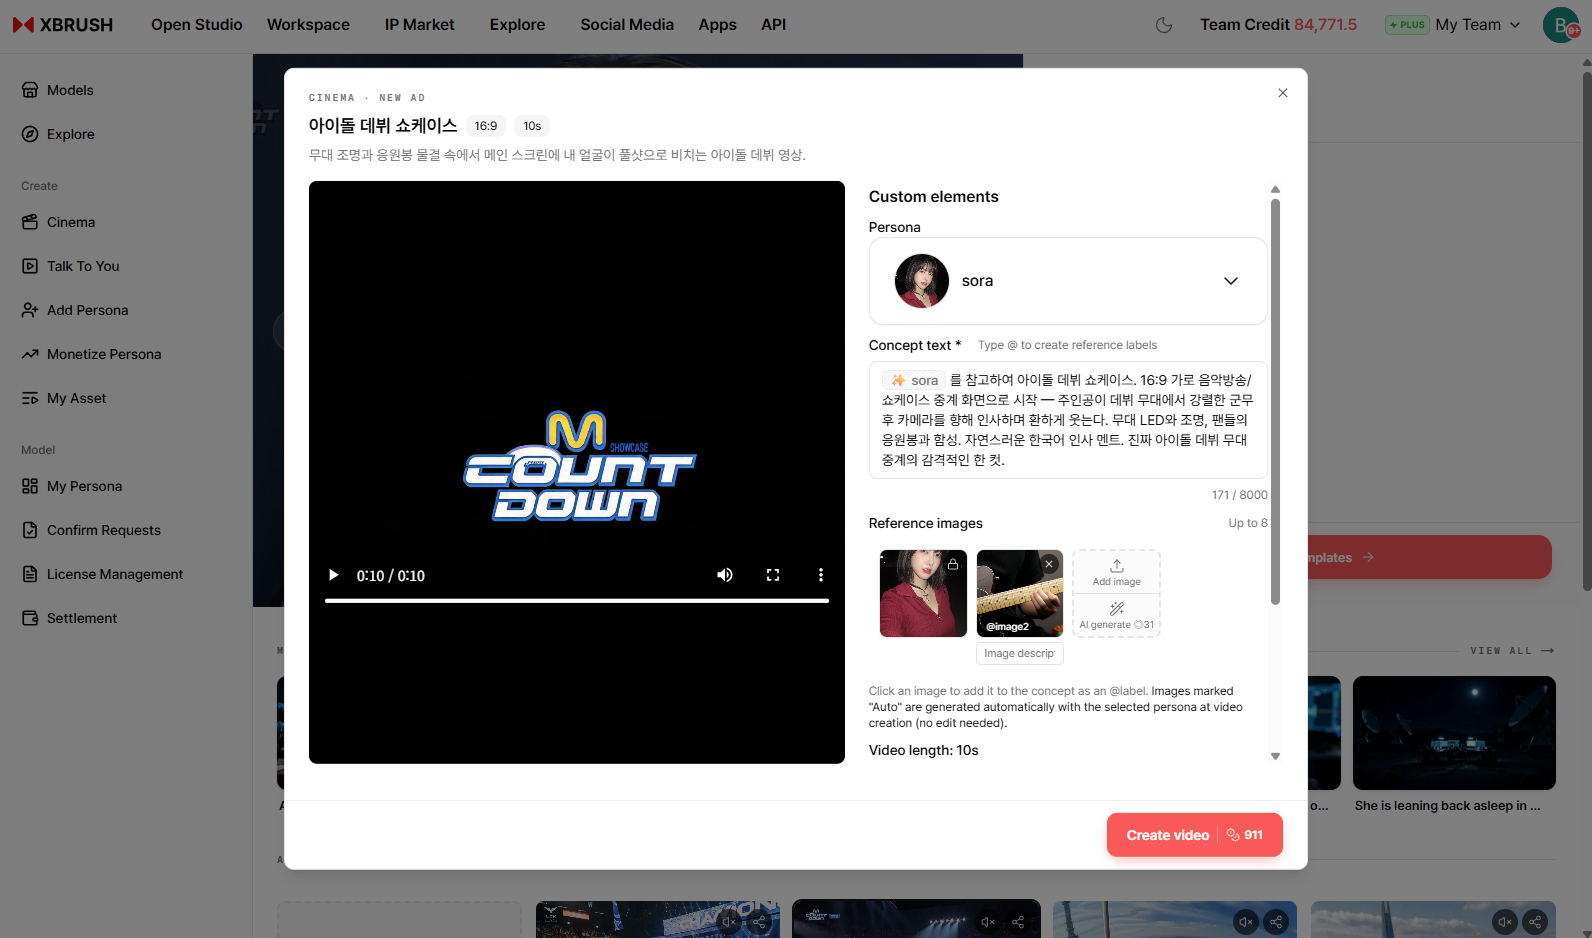
Template dialog — the template preview on the left, the Custom elements panel on the right.
The left panel plays a preview of the template, with the aspect ratio (16:9) and length (10s) shown next to the title. Fill in the Custom elements panel on the right:
- Persona — open the dropdown and pick the AI persona that will appear in the video.
- Concept text — the template's built-in script is pre-filled. Edit it to match your brand message. Type
@to create a reference label; the selected persona appears as an@tag (e.g.@sora). - Reference images — attach up to 8 images. Click an image to add it to the concept as an
@label. Images marked Auto are generated automatically with the selected persona at video creation, so no edit is needed. - Video length — drag the slider to set the duration.
Click Create video to start. The number next to the button is the credit cost for this generation.
Step 3 — Agree to the Real-Person Persona Notice
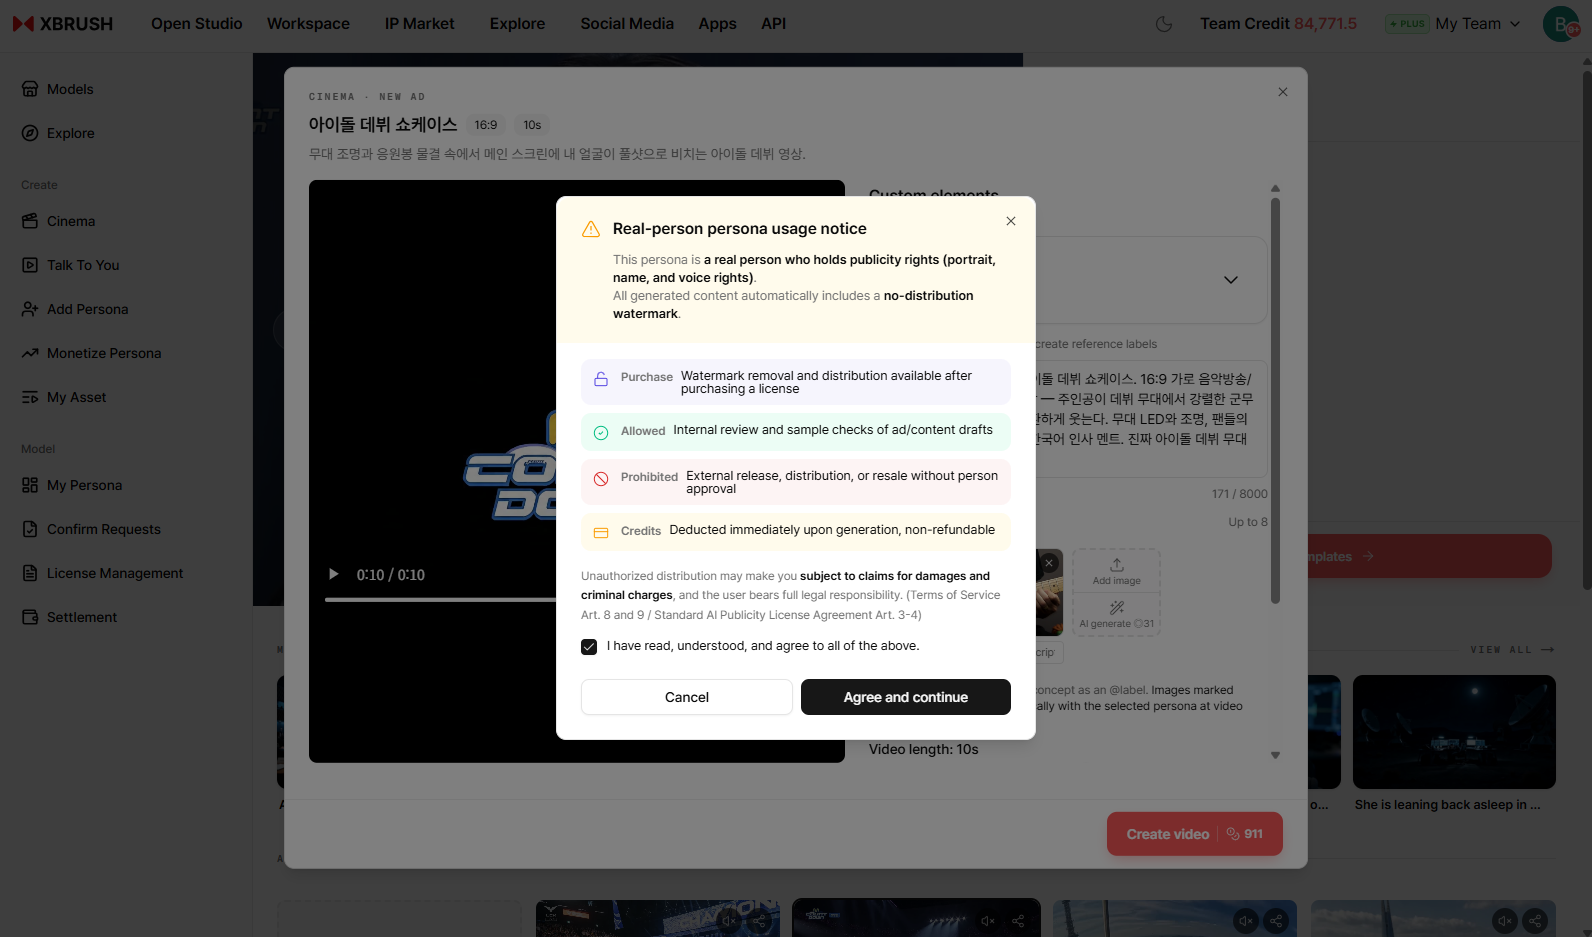
When the selected persona is a real person, a usage notice appears before generation starts.
If the persona holds publicity rights (portrait, name, and voice rights), a Real-person persona usage notice appears. Read it carefully before continuing:
| Item | What it means |
|---|---|
| Purchase | Watermark removal and distribution become available after you purchase a license |
| Allowed | Internal review and sample checks of ad/content drafts |
| Prohibited | External release, distribution, or resale without the person's approval |
| Credits | Deducted immediately upon generation, and non-refundable |
⚠️ All generated content automatically includes a no-distribution watermark. Unauthorized distribution may make you subject to claims for damages and criminal charges, and the user bears full legal responsibility (Terms of Service Art. 8 and 9 / Standard AI Publicity License Agreement Art. 3-4).
Tick I have read, understood, and agree to all of the above, then click Agree and continue. Generation starts and credits are deducted at that moment.
Step 4 — Template Result
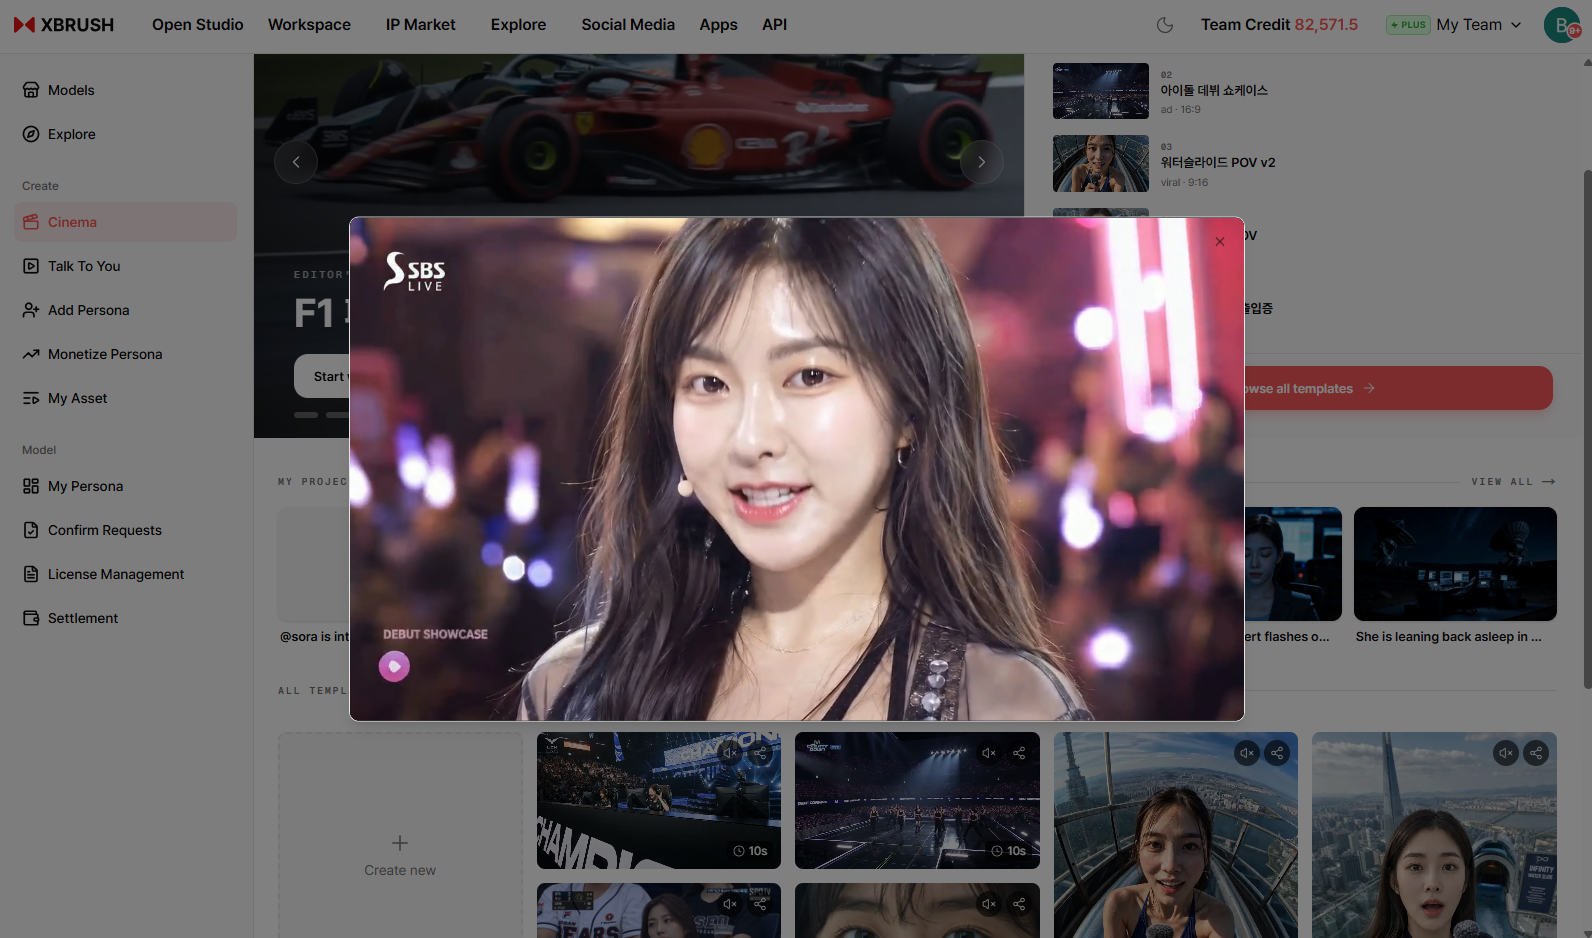
The completed video plays in an overlay player.
- While the video is being generated, a progress card appears in My Projects with the percentage and estimated time remaining.
- When it finishes, click the card to play the video in the overlay player.
- The finished video is saved to My Videos, where you can preview or download it.
- To refine it further, click the edit action button to open the Timeline Video Editor.
Method 2 — New Creation
Unlike templates, New Creation gives you full control from the start — pick your own persona, describe your idea in one or two sentences, and optionally attach reference images to shape the visual style. The AI generates an ad immediately from your inputs.
Step 1 — Click Create New
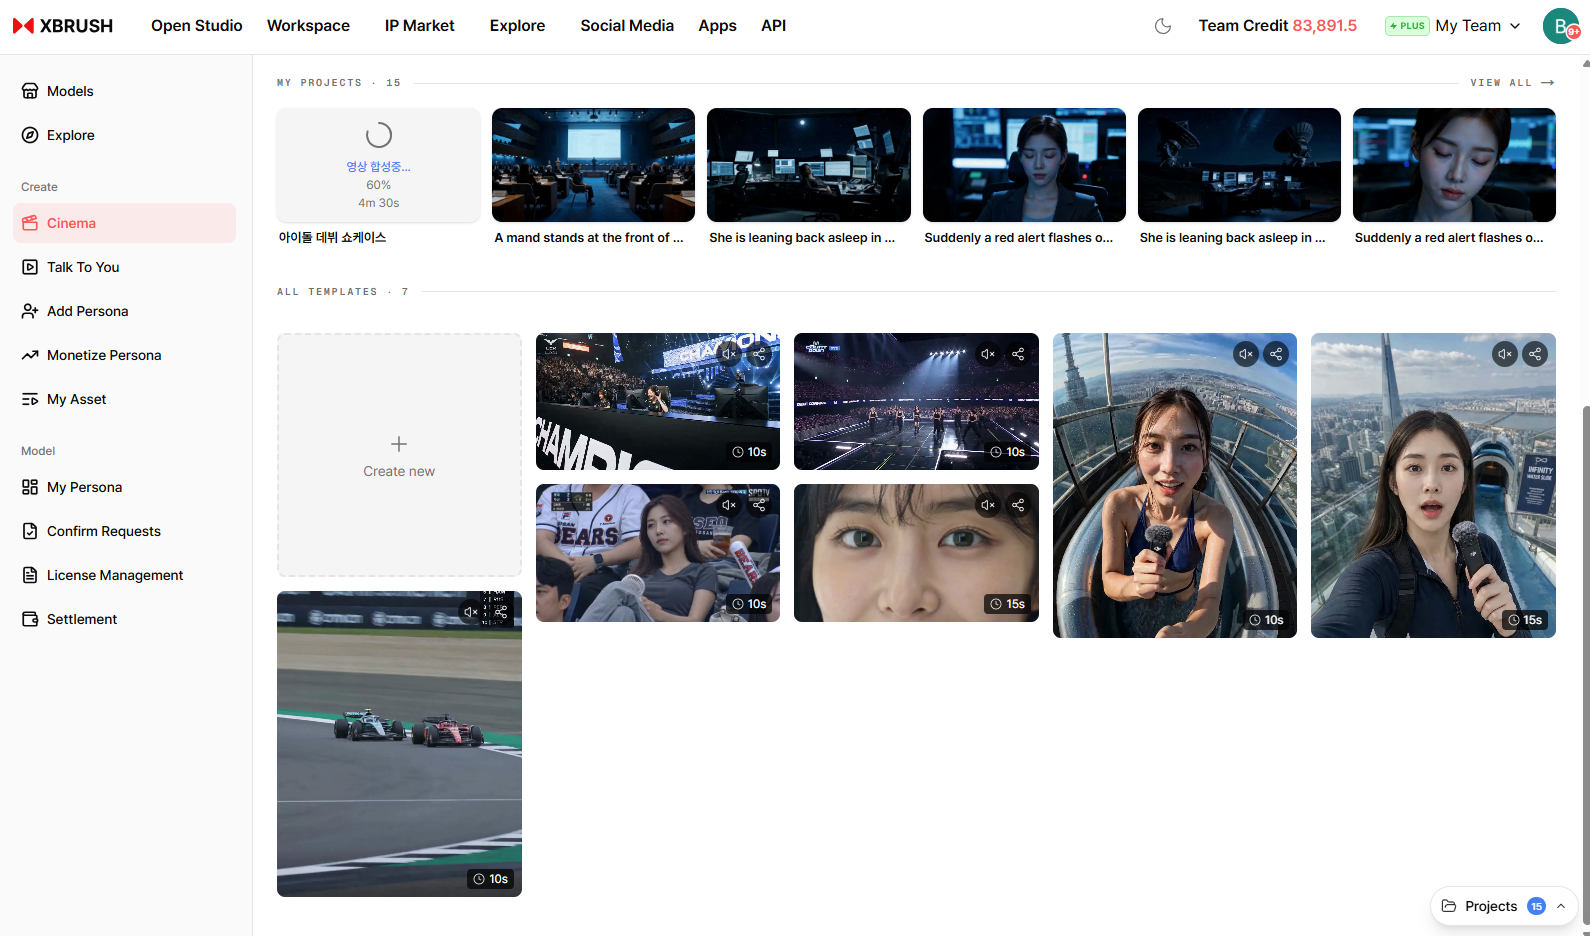
The Create new tile sits at the front of the All Templates grid.
- On the Cinema home screen, scroll down to the All Templates section.
- Click the + Create new tile at the front of the grid. The Create New dialog opens.
Step 2 — Enter Your Idea
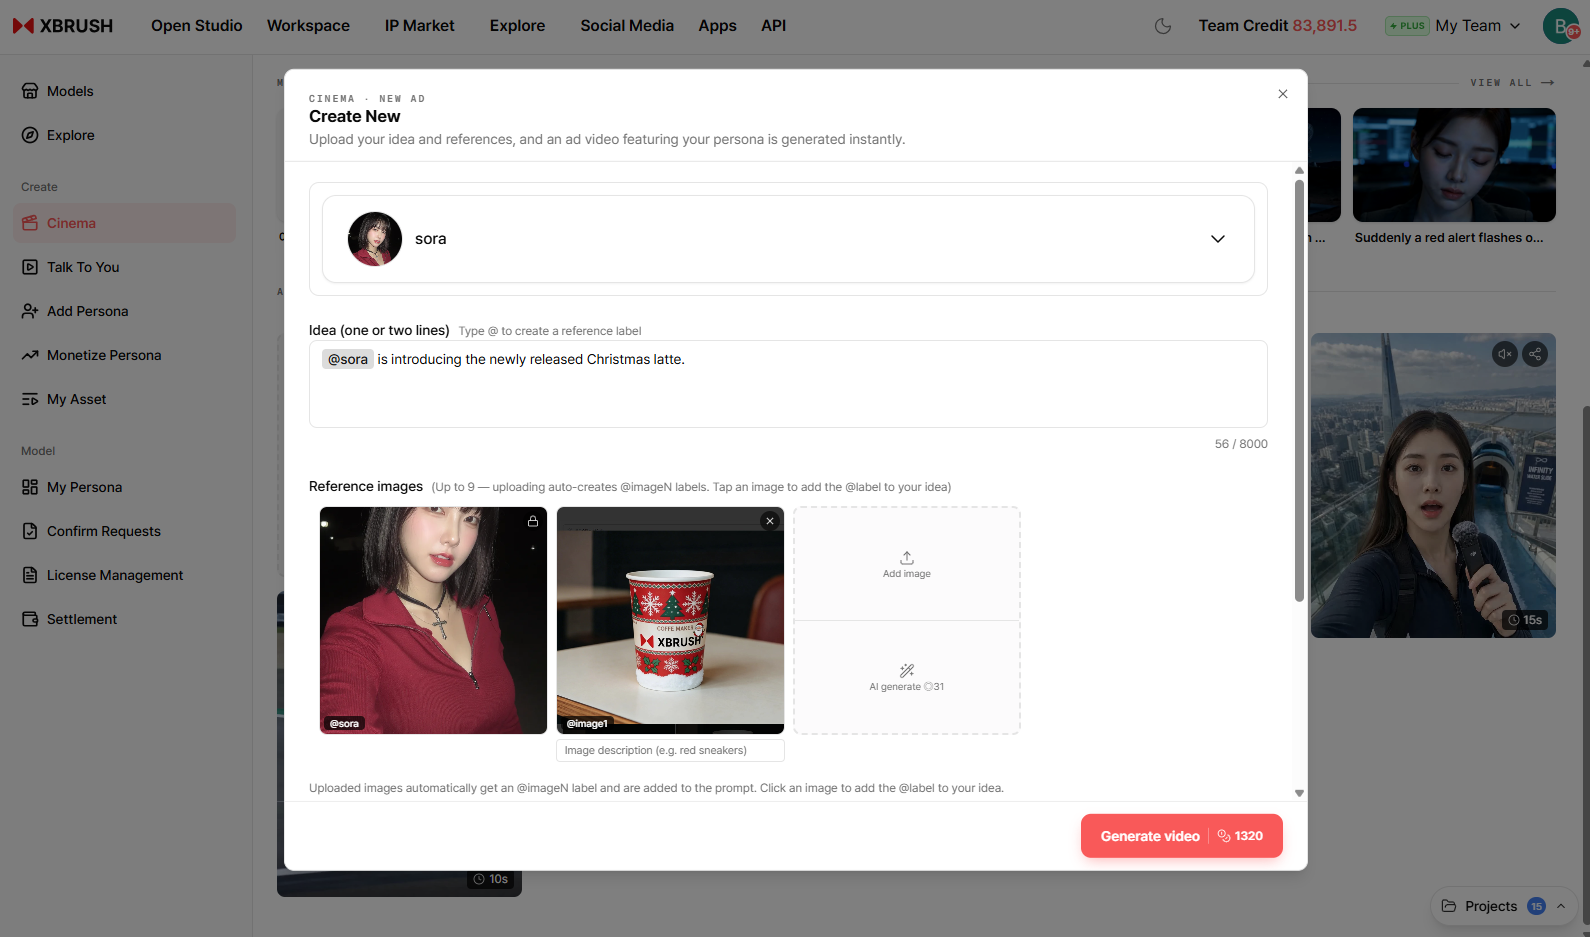
The Create New dialog — select a persona, describe the scene, and attach reference images.
In the Create New dialog:
- Persona — open the dropdown at the top and choose the AI persona that will appear in the video.
- Idea (one or two lines) — describe the scene or message (e.g., "
@sorais introducing the newly released Christmas latte"). Type@to create a reference label. - Reference images — upload up to 9 images, or click AI generate to auto-generate one from your idea. Each upload is automatically assigned an
@imageNlabel; tap an image to add its label to your idea. - Video length — drag the slider to set the duration.
Click Generate video to start production. The number next to the button is the credit cost.
💡 Direct the shot with
@tags. Personas can be referenced by name with the same@syntax (e.g.@Essel). The more precisely you describe the sequence — which image appears when, and what the persona says — the closer the output matches your intent.Example prompt: "The video opens with
@image1(logo), then pans through the interior from@image2while@Esselappears and says 'Let's bring to life the dream of a warm, cozy home that everyone longs for,' introducing the space. The video closes with@image3."
If the persona you selected is a real person, the Real-person persona usage notice from Step 3 of the template flow appears here as well. Review and agree to it to continue.
Step 3 — New Creation Result
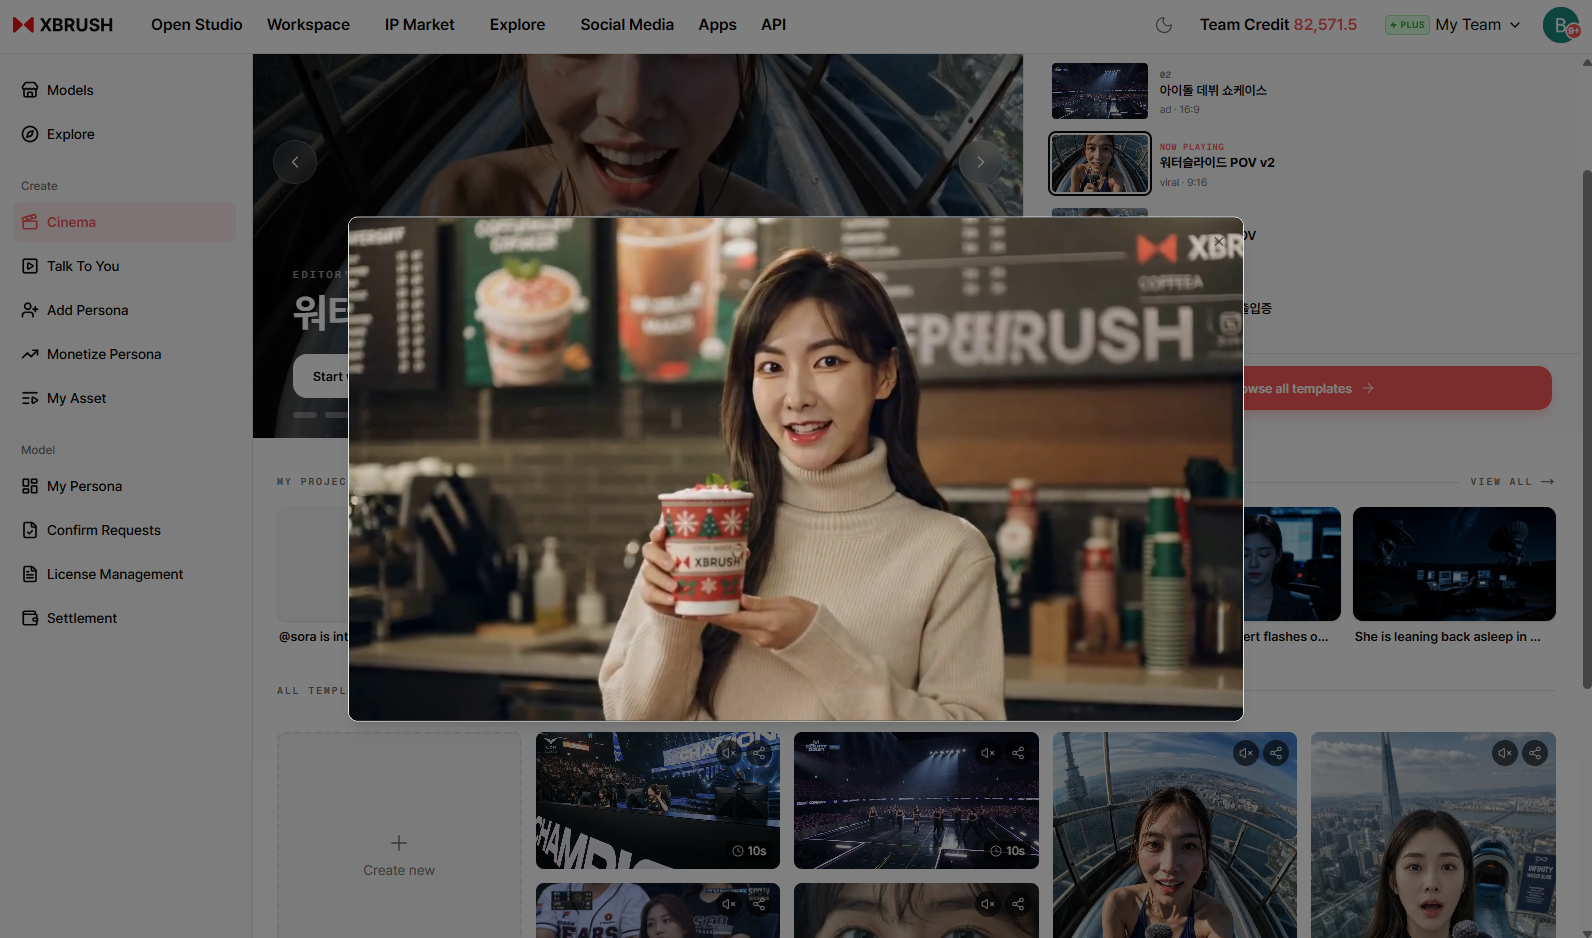
The generated ad video plays in an overlay player.
- Generation progress is shown on the card in My Projects.
- Click the finished card to play the video in the overlay player.
- The video is saved to My Videos and can be refined in the Timeline Video Editor.
Timeline Video Editor
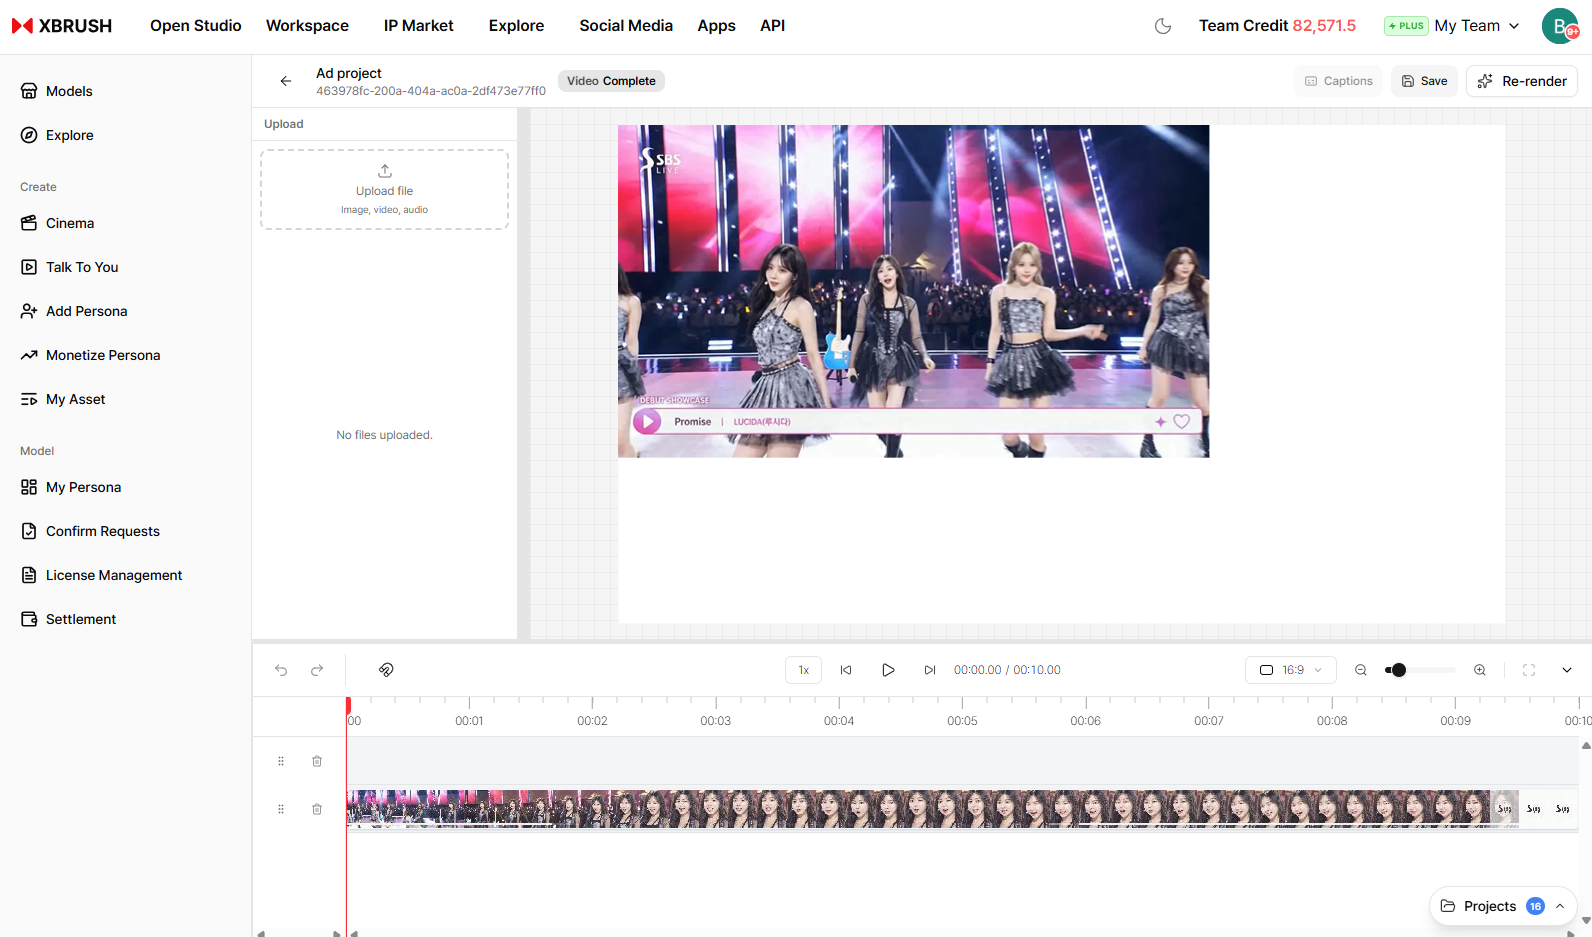
The Timeline Video Editor — opened by clicking the edit action button on a generated video.
After a video is generated (via template or new creation), click the edit action button on the video card to open the Timeline Video Editor:
- The main timeline displays the generated clip with its full duration.
- The left panel (Upload Assets) lets you upload additional video clips, images, or music.
- The right panel (My Projects) lists your recent Cinema projects for quick reference.
- Trim clips, add background music, or adjust timing before exporting the final video.
- Click Save to save your edits.
Tips
- Use the Template path for quick, polished results when a pre-built narrative fits your brand.
- Use New Creation when you need full control over the script, persona, and visual style.
- The timeline editor is the best place to add background music or trim the video before publishing.